Ingredients:
Filling:
3 cups minced nappa cabbage (also called Chinese cabbage) leaves (about 1/2 medium head)
3/4 tsp table salt
3/4 lb ground pork
4 minced scallions (about 6 tablespoons)
2 egg whites, lightly beaten
4 tsp soy sauce
1 1/2 tsp minced or fresh grated ginger
1 medium garlic clove, minced
1/8 tsp ground black pepper
Wrappers:
1 package wonton wrappers ( it was the only thing I could find, I really don't know how many it made, probably at least 40 or so?)
dish of water
2 Tbsp vegetable oil( I used olive oil)
Directions:
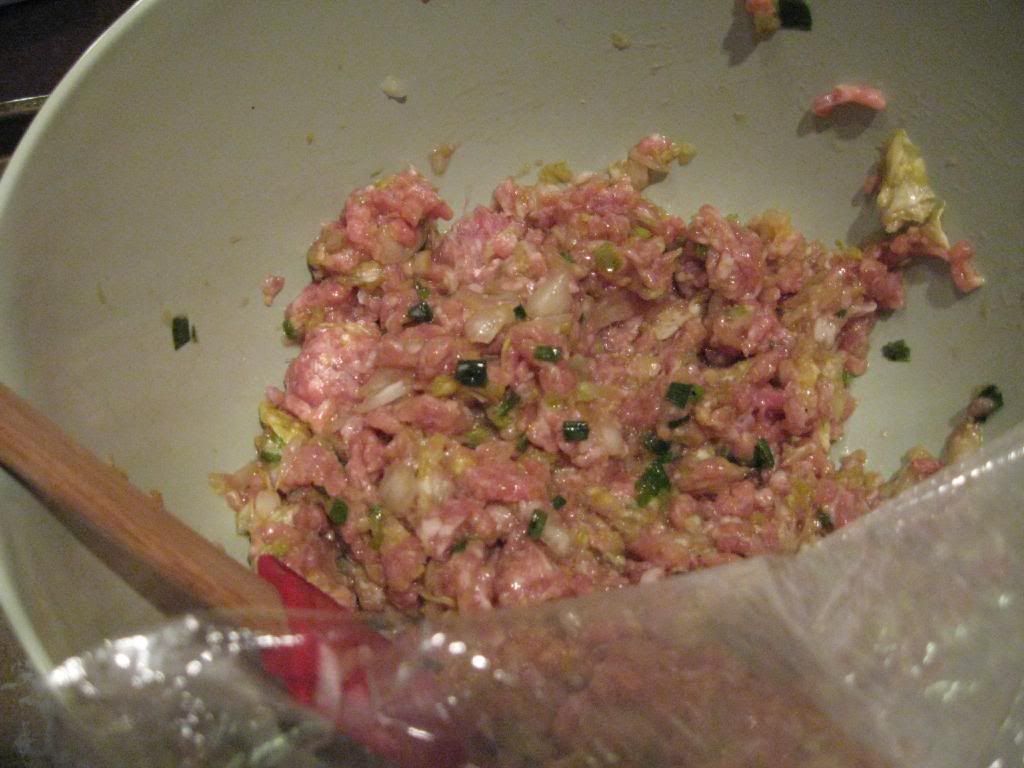
1. For the filling: Toss cabbage with the salt in colander set over a bowl and let stand until cabbage begins to wilt, about 20 minutes. Press the cabbage gently with rubber spatula to squeeze out any excess moisture (I ended up having to grab it with my hands and squeeze out the liquid), then transfer to a medium bowl. Add the remaining filling ingredients and mix thoroughly to combine. Cover with plastic wrap and refrigerate until mixture is cold, at least 30 minutes or up to 24 hours.
2. For the dumplings: Place 1 rounded teaspoon of filling in the center of the wonton wrapper. Use the photos below and this website to help you know how to fold the wontons. I did find it very helpful to place water on the edge that you are trying to join. It helps the wonton wrapper stick to itself.
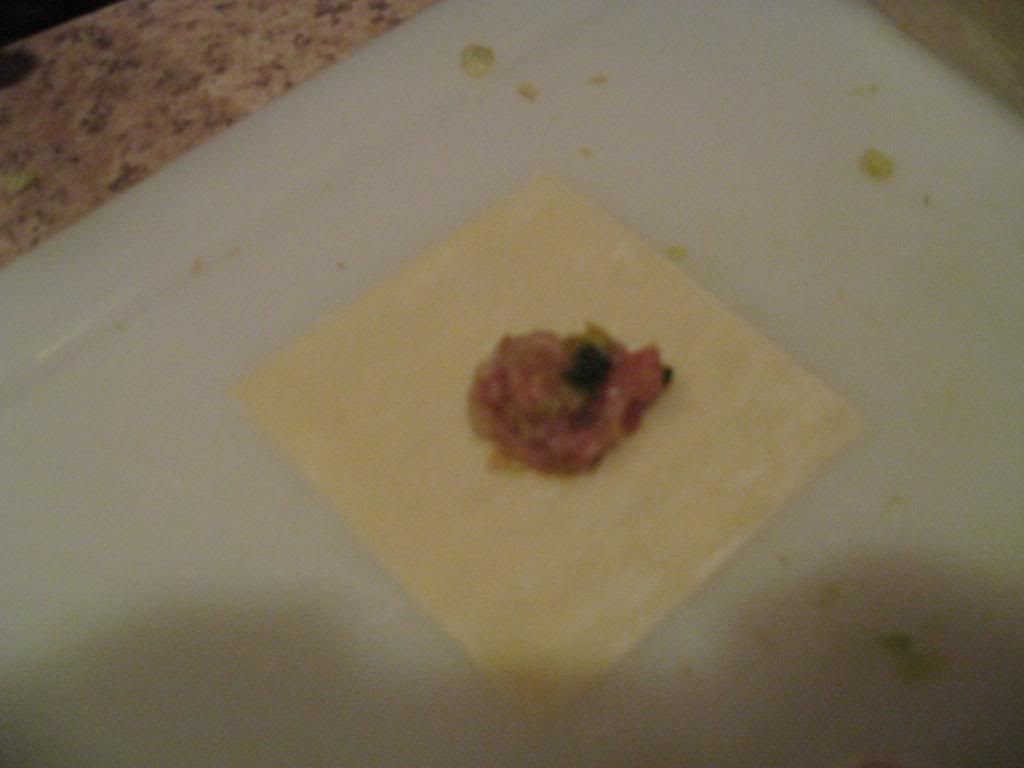 Place one teaspoon of filling in the center of the wrapper.
Place one teaspoon of filling in the center of the wrapper.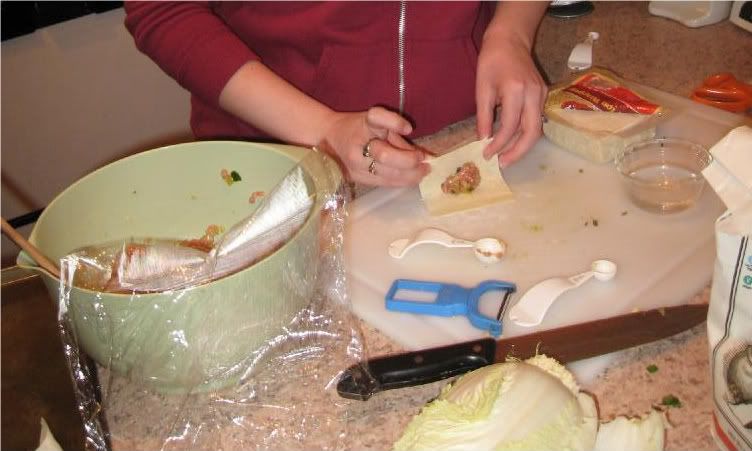 Fold in half once.
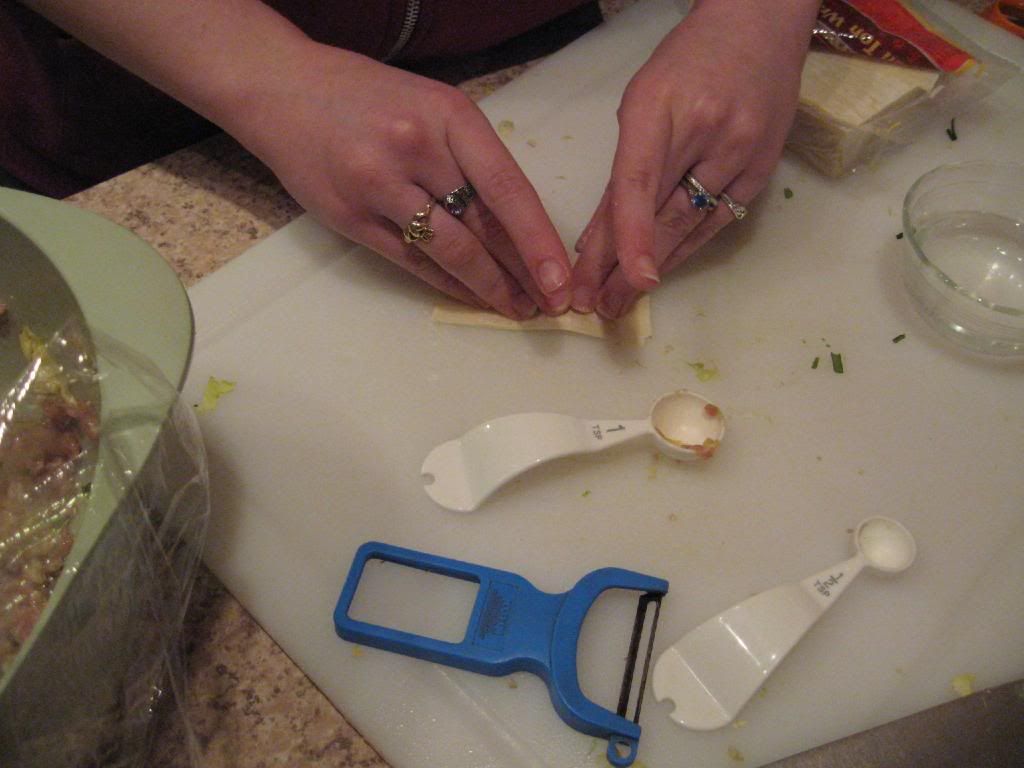 Fold in half the same direction again.
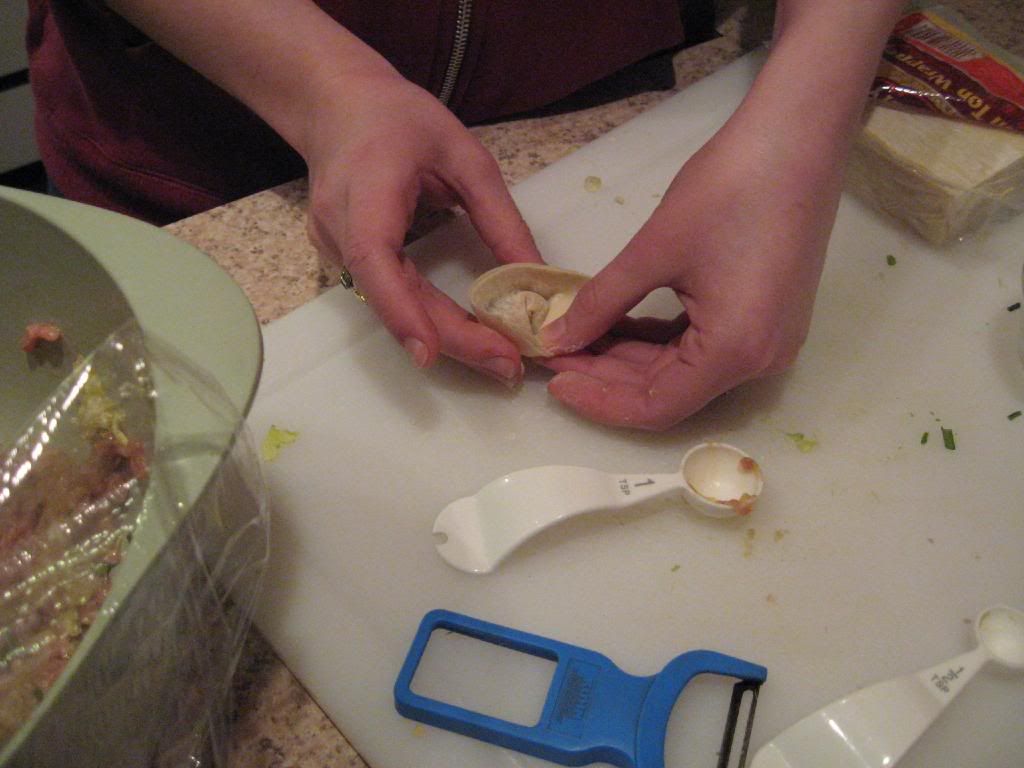
Fold the corners onto each other like shown in the website directions. It's really hard to explain, but they end up looking like "nurse's caps".
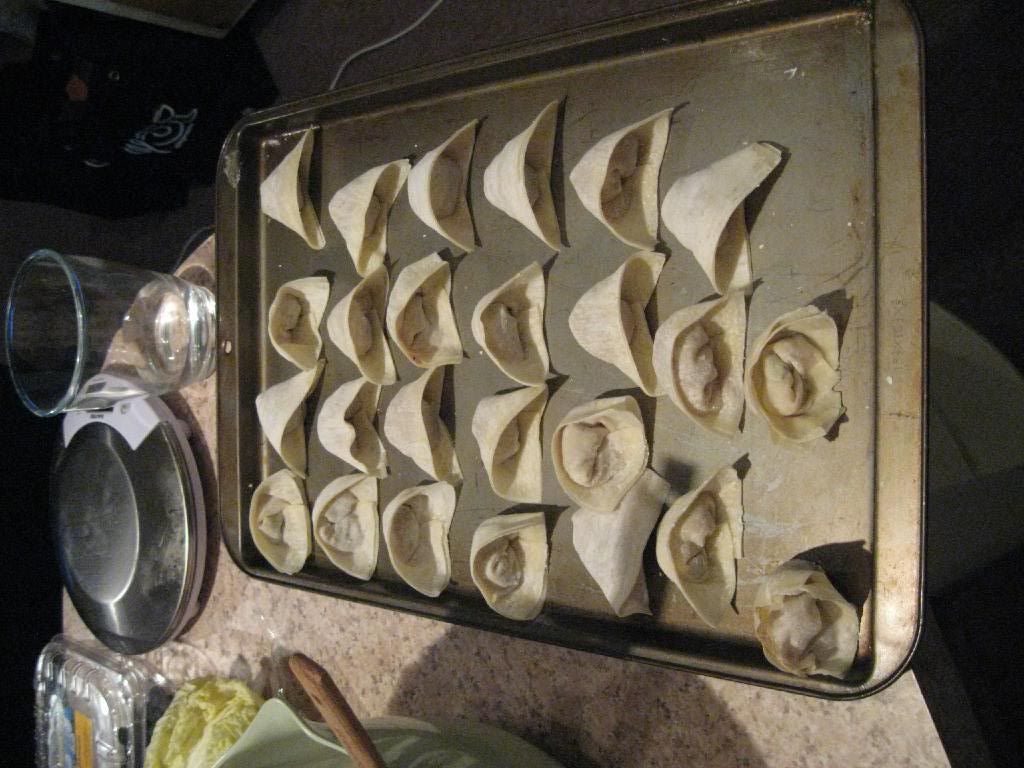
Transfer the dumplings to a baking sheet and repeat with the remaining wrappers and filling. The dumplings can be wrapped tightly with plastic wrap and refrigerated for up to 1 day or frozen for up to one month. Once frozen, do not thaw before cooking, start directly with step 3.
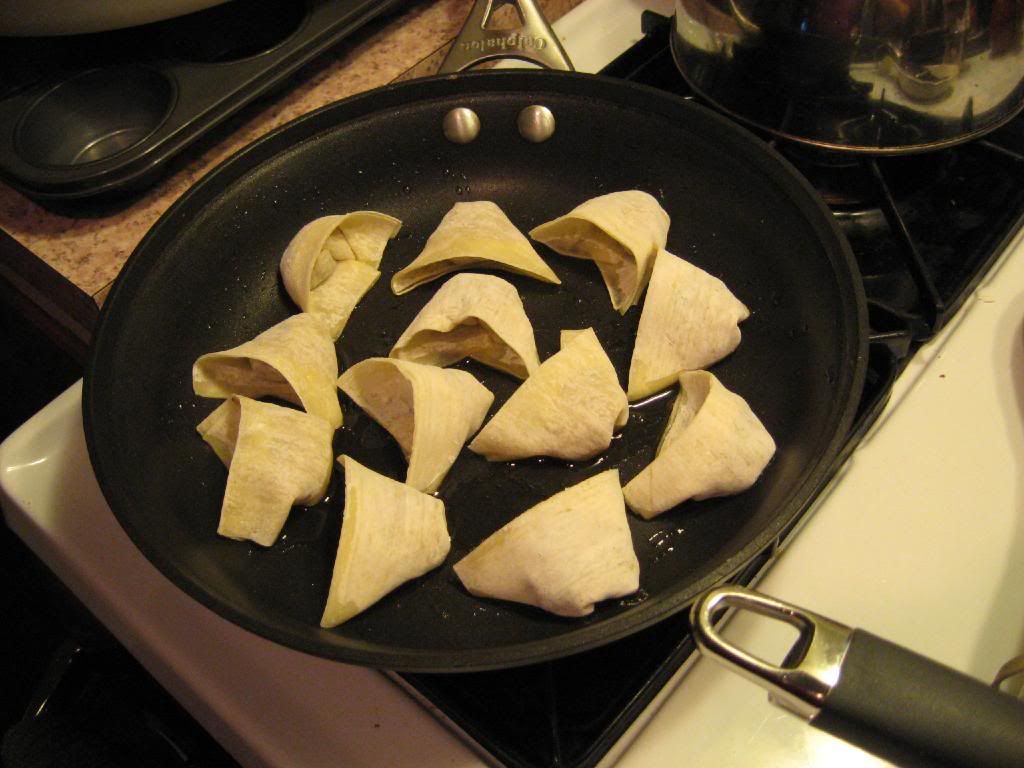
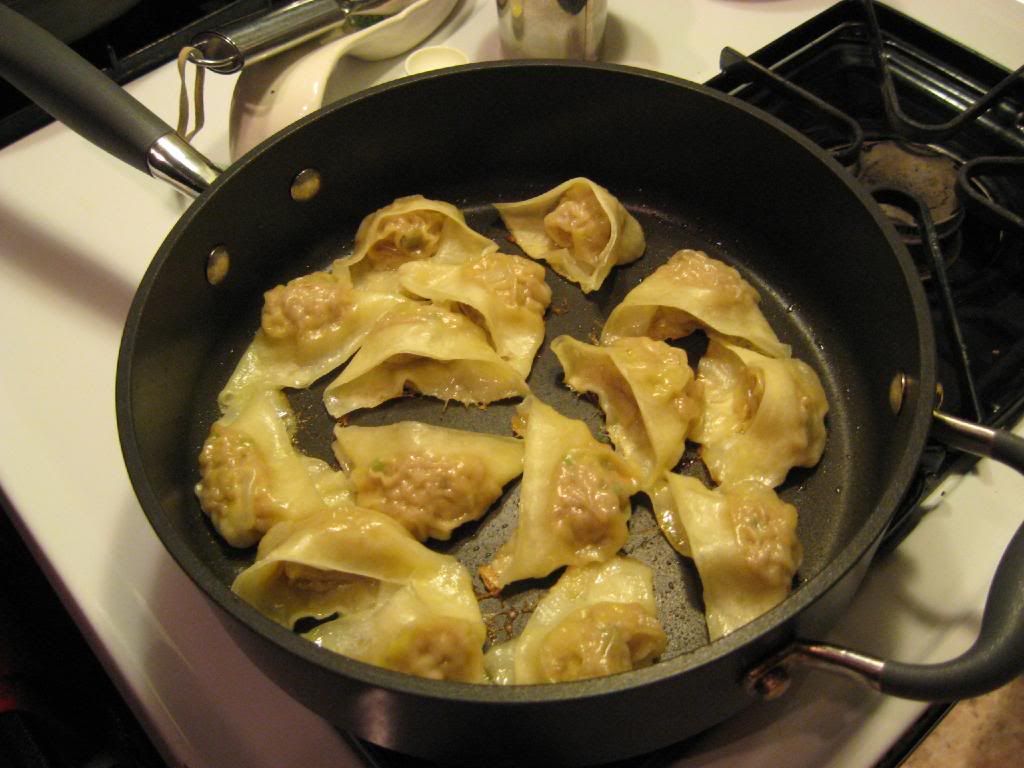
3. Line a large plate with a double layer of paper towels; set aside. brush 1 tablespoon of the oil over the bottom of a 12inch non stick skillet and arrange half of the dumplings in the skillet, with a flat side down (overlapping slightly if necessary). place the skillet over medium-high heat and cook the dumplings, without moving, until golden brown on the bottom, about 5 minutes.
4. Reduce heat to low, add 1/2 cup of water and cover immediately. Continue to cook, covered until most of the water is absorbed and the wrappers are slightly translucent, about 6 minutes.
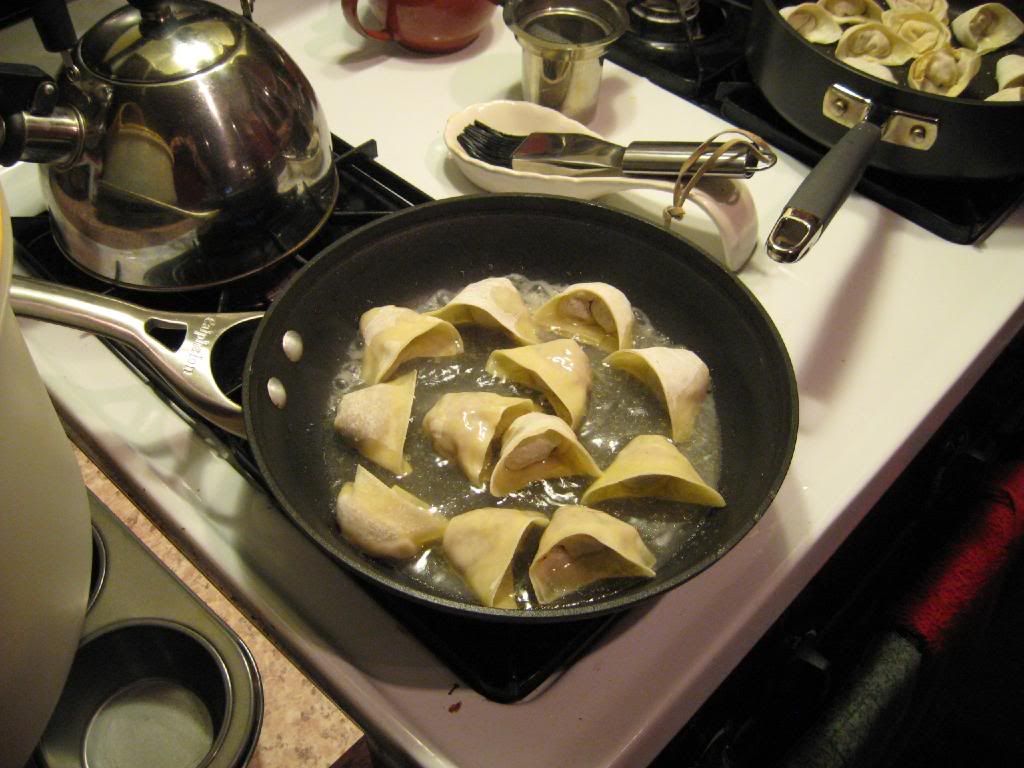
Uncover the skillet, increase the heat to medium-high, and continue to cook without stirring until the dumpling bottoms are well browned and crisp, 3 to 4 minutes more.
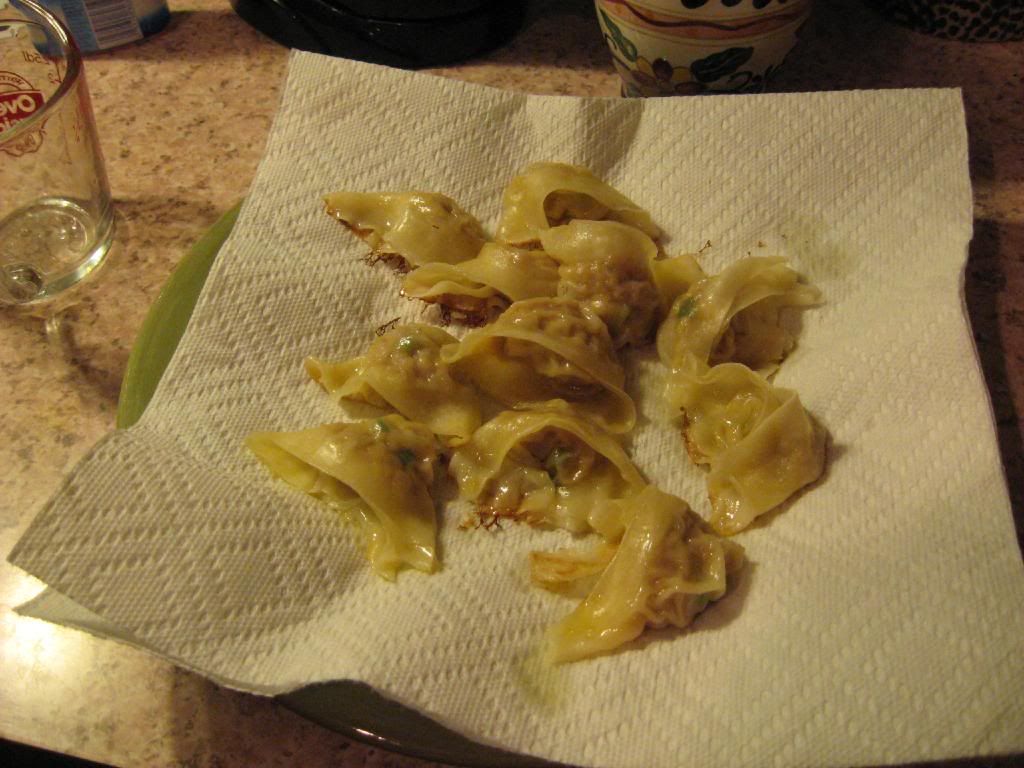
Slide the dumplings onto the paper towel-lined plate, browned slide facing down, and let drain briefly (if you let them sit too long they will start to stick together. Transfer the dumplings to a serving platter with scallion dipping sauce.
Uncover the skillet, increase the heat to medium-high, and continue to cook without stirring until the dumpling bottoms are well browned and crisp, 3 to 4 minutes more.
Slide the dumplings onto the paper towel-lined plate, browned slide facing down, and let drain briefly (if you let them sit too long they will start to stick together. Transfer the dumplings to a serving platter with scallion dipping sauce.
Let the skillet cook until just warm, then wipe it clean with a wad of DRY paper towels and repeat step 3 and 4.
Scallion Dipping Sauce:
Makes 3/4 cup
1/4 cup soy sauce
2 Tbsp rice vinegar
2 Tbsp mirin
2 Tbsp water
1 tsp chili oil (optional)
1/2 tsp toasted sesame oil
1 medium scallion, white and green parts, minced
Combine all ingredients in bowl and serve.
1 comment:
These look great! I love the step by step photos!
Post a Comment